How to sew amigurumi parts together
Almost all amigurumi require pieces to be put together, whether that’s an arm to a body or a beak to head. The method below explains how to join an open piece to a closed piece. With this method, the seam and remaining yarn tail should be invisible.
How to join amigurumi pieces (step-by-step with photos)
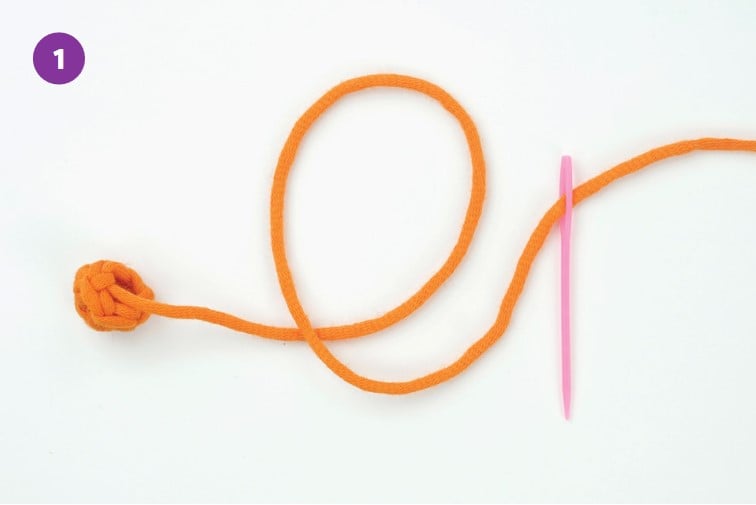 1. Invisible fasten off the piece being sewn on (Piece A). 1. Invisible fasten off the piece being sewn on (Piece A). | 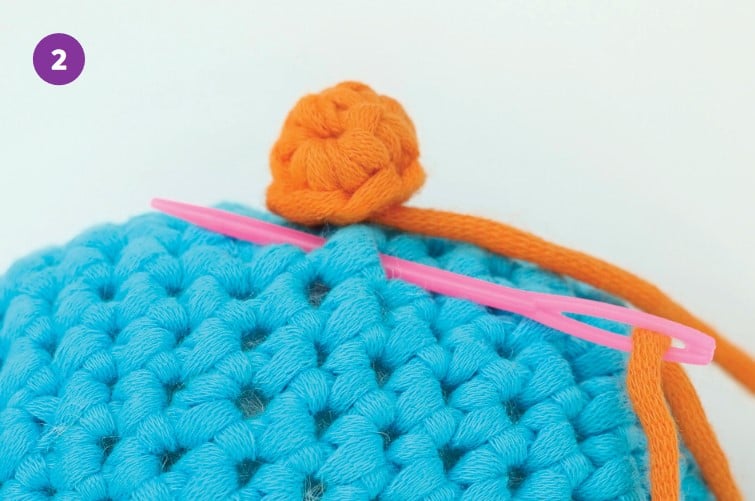 2. Hold Piece A on top of the other piece (Piece B), with the “right side” visible. Thread a needle with Piece A’s yarn tail from the invisible fasten off. Insert the needle into Piece B right under the point where the yarn tail came out from. Pull it out of Piece B one stitch over, following the edge of the Piece A. Pull the yarn tight after every step. 2. Hold Piece A on top of the other piece (Piece B), with the “right side” visible. Thread a needle with Piece A’s yarn tail from the invisible fasten off. Insert the needle into Piece B right under the point where the yarn tail came out from. Pull it out of Piece B one stitch over, following the edge of the Piece A. Pull the yarn tight after every step. |
TIP
Use pins to hold Piece A in place as you sew it on.
 3. Insert the needle under the top loops of Piece A from the bottom up, directly above where it came out of Piece B. 3. Insert the needle under the top loops of Piece A from the bottom up, directly above where it came out of Piece B. | 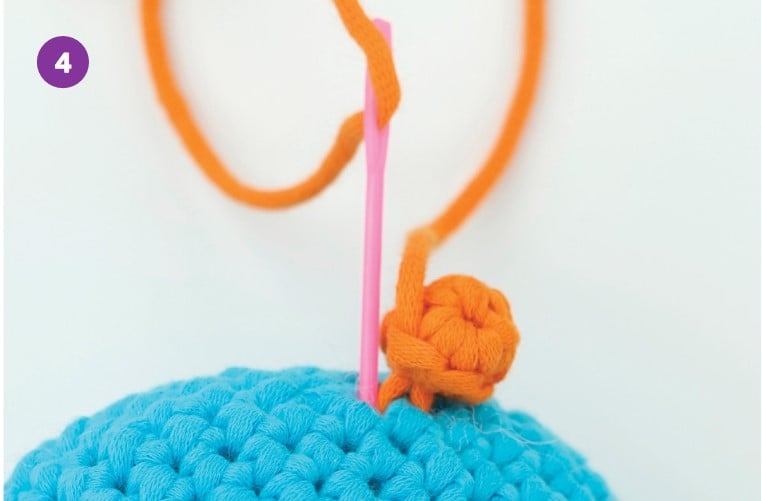 4. Bring the needle over the top loops of the same stitch on Piece A and insert it into the same hole it just came out of. 4. Bring the needle over the top loops of the same stitch on Piece A and insert it into the same hole it just came out of. |
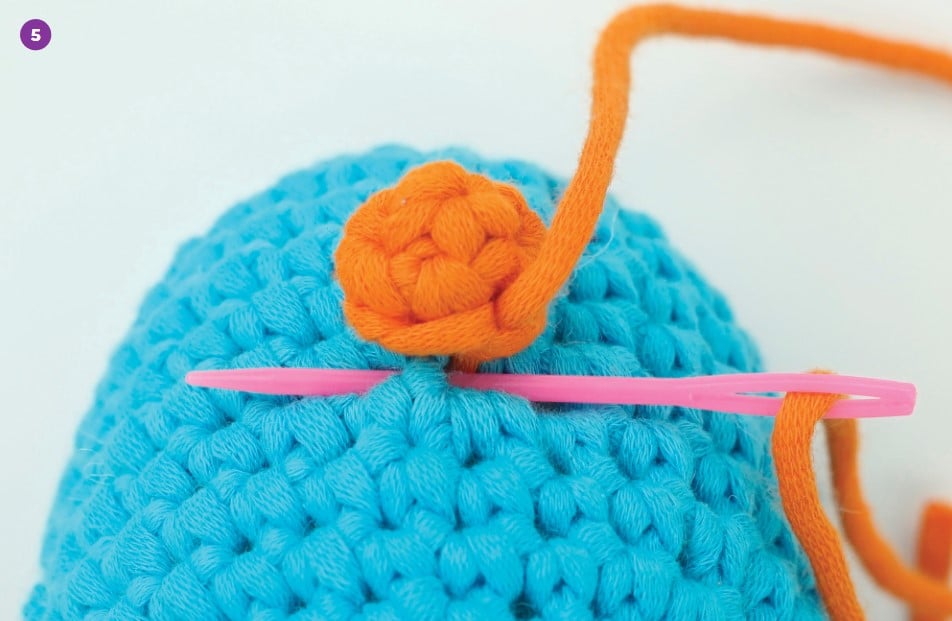 5. Pull it out of Piece B one stitch over, following the edge of Piece A. 5. Pull it out of Piece B one stitch over, following the edge of Piece A. |  6. Repeat steps 3–5 until all of Piece A is sewn onto Piece B. To finish, hide the yarn tail in the piece. 6. Repeat steps 3–5 until all of Piece A is sewn onto Piece B. To finish, hide the yarn tail in the piece. |