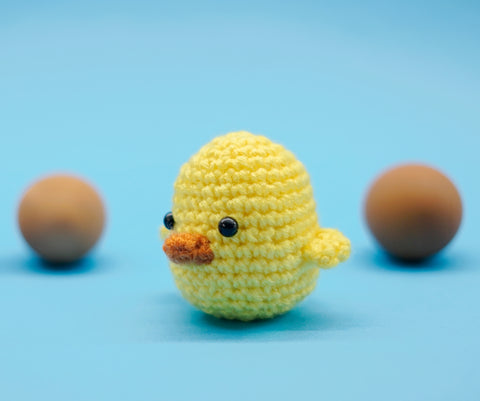
Free Chick Amigurumi Crochet Pattern
This free pattern is written for people who already know how to crochet amigurumi.
If you have a Chick Crochet Kit, go to the link on the back of the card that came with your kit for step-by-step videos for complete beginners.
If you’re completely new to crochet or amigurumi, snag a Chick Beginner Crochet Kit. It comes with step-by-step videos for complete beginners, and with all the materials you need. After going through the kit, you’ll be on your way to being able to make all The Woobles patterns!

Materials
These are the exact materials I used to create the chick. I make a commission for purchases made through the following links.
- 4mm crochet hook
- Stitch marker
- Tapestry needle
- 8mm safety eyes
- Poly-fil stuffing
- Red Heart Super Saver Yarn, Golden Yellow (25 yds), Orange (1 yd)
- Scissors
- Pins (optional)
Rather not assemble the materials yourself? Buy a Chick Crochet Kit instead.
Notes
This pattern is written in US terminology, and crocheted in the round.
While pins are optional, they are recommended since it makes it much easier to plan and sew on the amigurumi pieces,
If you use worsted-weight yarn and a 4.0mm hook, the chick will come out to 3 in (7.6 cm) tall. Just like a real chick, it’ll nestle quite nicely in the palm of your hand!
Terminology
- sc: single crochet
- inc: increase stitch (2 sc in 1 stitch of the previous round)
- dec: (invisible) decrease
- magic loop: also known as a magic ring
- rnd: round
- [sc, inc] x 3: 1 sc followed by 1 inc, repeated 3 times
- (6 sts): 6 total stitches in the round
Pattern
Head & Body
Use yellow yarn.
Rnd 1: 6 sc in magic loop (6 sts)
⚠️ To keep track of where you are, use a stitch marker to mark the beginning of each rnd. Each time you start a new rnd, move the stitch marker to the first stitch of that rnd.
Rnd 2: inc x 6 (12 sts)
Rnd 3: [sc, inc] x 6 (18 sts)
Rnd 4: [inc, 2 sc] x 6 (24 sts)
Rnd 5: 24 sc (24 sts)
⚠️ Your work might start curling at this point. For a neater final look, flip it inside out so that the “right side” faces out.
Rnd 6: [5 sc, inc] x 4 (28 sts)
Rnd 7-9: 28 sc (28 sts)
Rnd 10: [6 sc, inc] x 4 (32 sts)
Rnd 11-12: 32 sc (32 sts)
Rnd 13: [2 sc, dec] x 8 (24 sts)
Rnd 14: 24 sc (24 sts)
Rnd 15: [sc, dec] x 8 (16 sts)
Rnd 16: 16 sc (16 sts)
Insert the safety eyes between Rnds 8 & 9, with 5 stitches between them. If this toy is for a baby or pet, embroider the eyes instead. Stuff your piece, shaping it like an egg.
Rnd 17: dec x 8 (8 sts)
Fasten off. To close the remaining gap, use a tapestry needle to sew through the front loops of each stitch in a clockwise order.
Beak
Use orange yarn.
Rnd 1: 4 sc in magic loop (4 sts)
Rnd 2: [sc, inc] x 2 (6 sts)
Fasten off with a long tail. Don’t stuff. Flatten and attach the beak at Rnd 10, centered between the eyes.
Wings
Use yellow yarn. Make two.
Rnd 1: 4 sc in magic loop (4 sts)
Rnd 2: inc x 4 (8 sts)
Rnd 3: 8 sc (8 sts)
Fasten off with a long tail. Don’t stuff. Flatten the wing and slip stitch the opening closed.