How to make a magic loop for lefties
A magic loop, also called a magic ring, magic circle, adjustable ring, or adjustable loop, is the preferred way to start crocheting in the round. It’s considered magical because the result has no hole in the middle.
However, the magic loop can be tricky to master so if you’re having a lot of trouble with it, you can start a round piece with a chain instead.
Making the magic loop step-by-step (with photos)
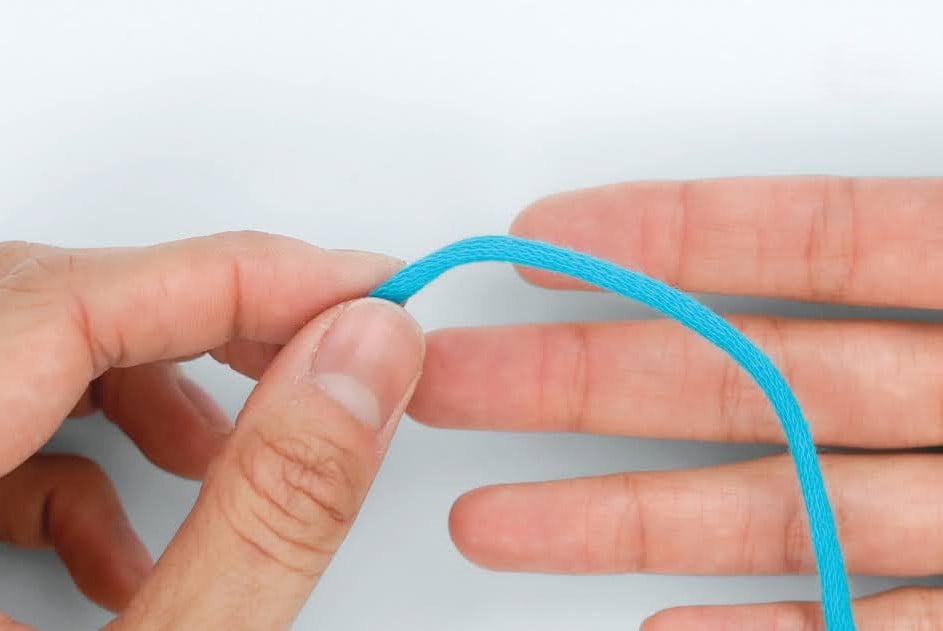 1. Turn your right palm to face you. Hold the yarn tail in your left hand and place the yarn in front of your right palm. 1. Turn your right palm to face you. Hold the yarn tail in your left hand and place the yarn in front of your right palm. | 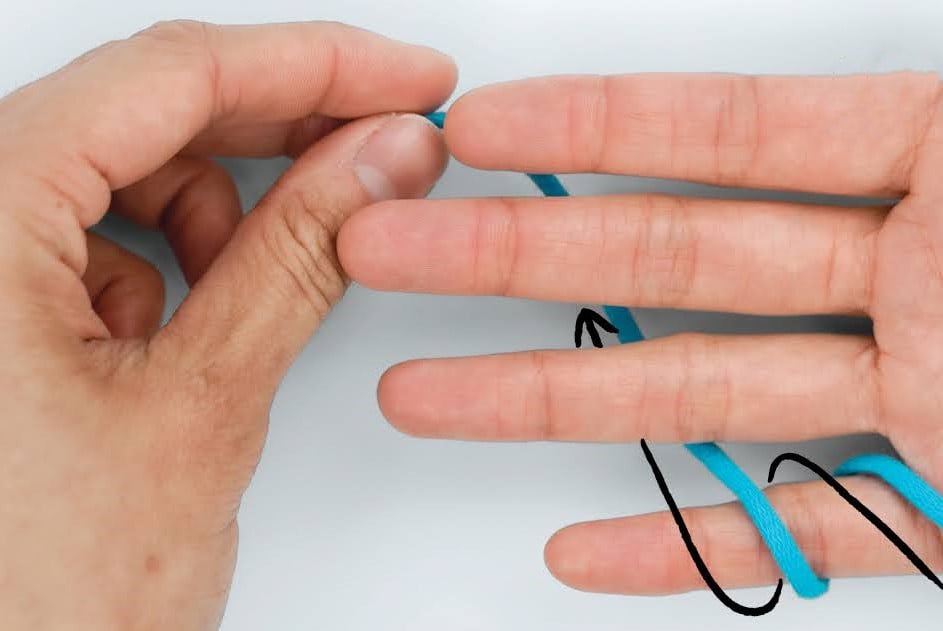 2. Wrap the working yarn once around your pinky, so that the yarn tail ends up behind your hand. 2. Wrap the working yarn once around your pinky, so that the yarn tail ends up behind your hand. | 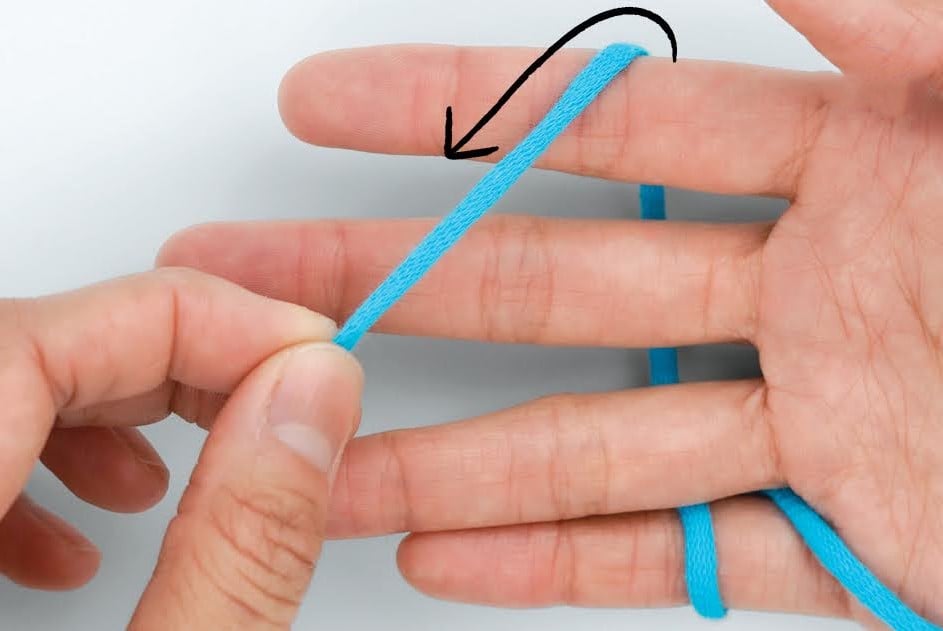 3. Bring the yarn tail up the back of your hand until you can drape it over your pointer finger. 3. Bring the yarn tail up the back of your hand until you can drape it over your pointer finger. | 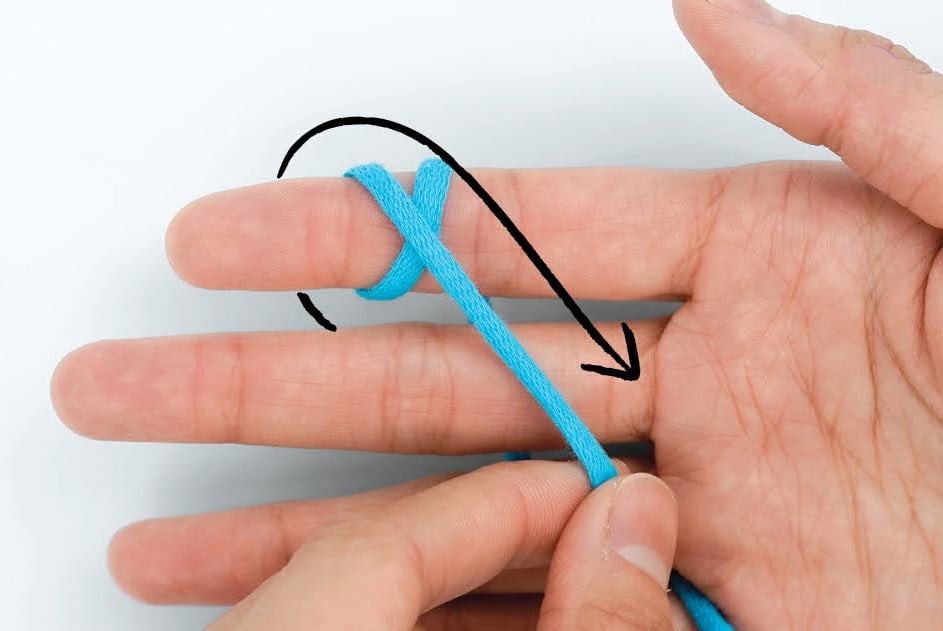 4. Loop it once around your pointer finger, so it crosses in front of your finger. 4. Loop it once around your pointer finger, so it crosses in front of your finger. |
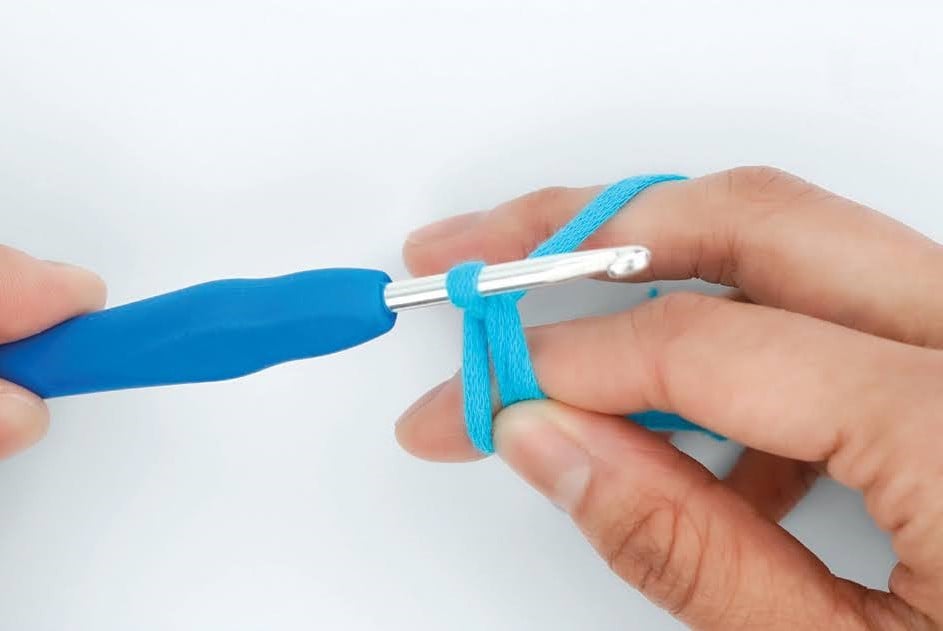
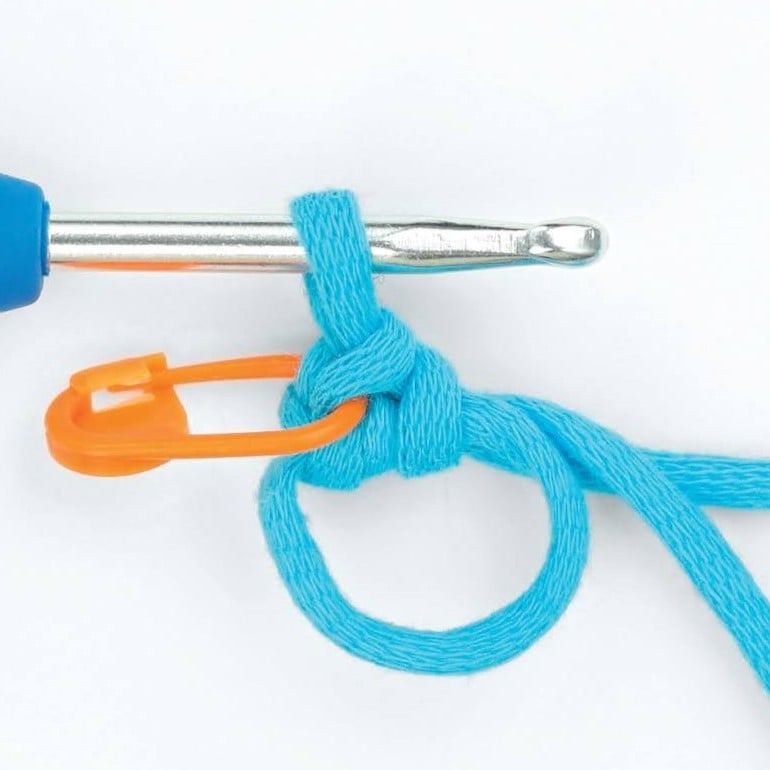
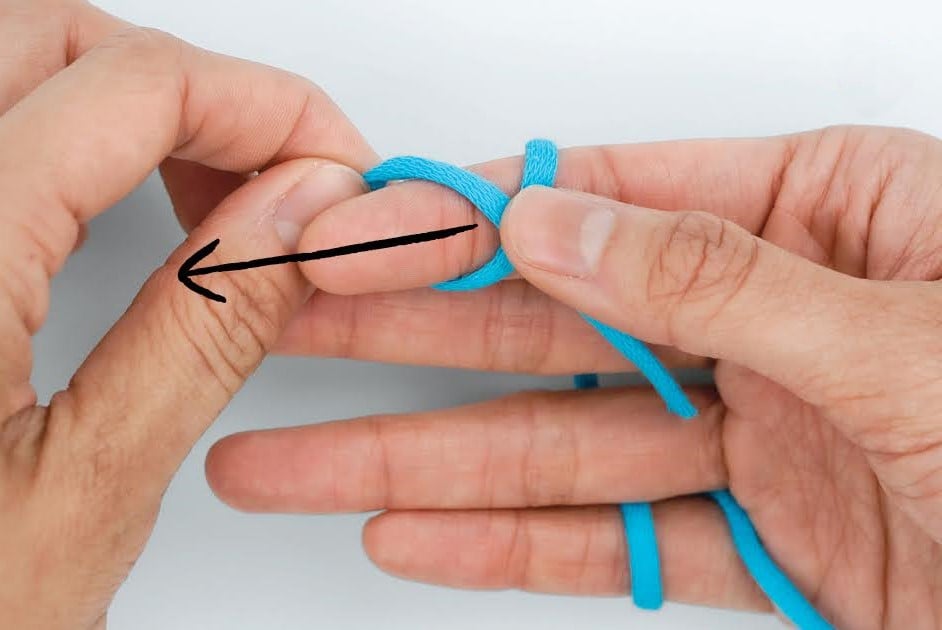 5. Hold onto the intersection with your right thumb and slide the loop off your finger using your left hand. 5. Hold onto the intersection with your right thumb and slide the loop off your finger using your left hand. | 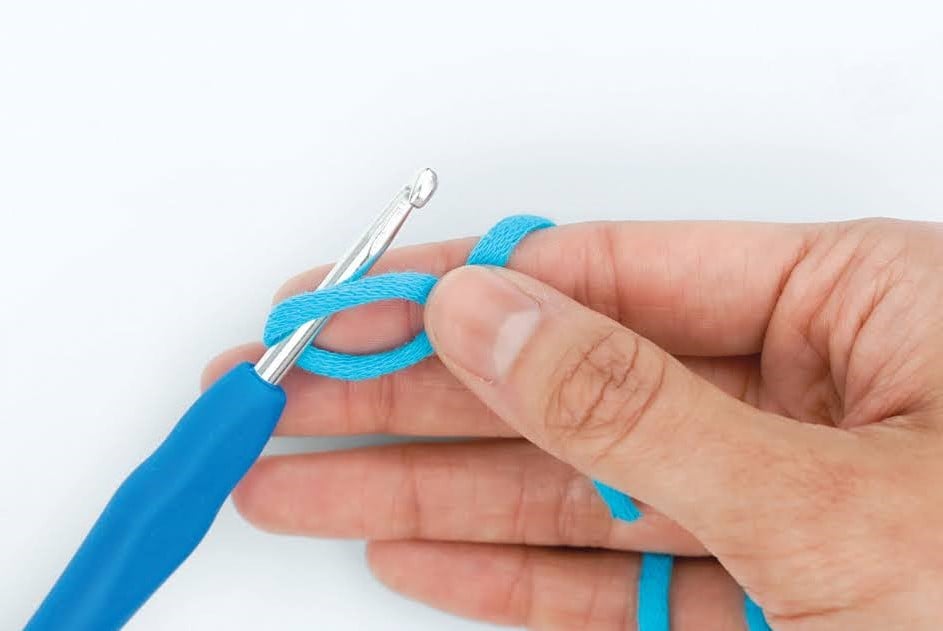 6. Insert the hook through the middle of the loop, from the front to the back. 6. Insert the hook through the middle of the loop, from the front to the back. | 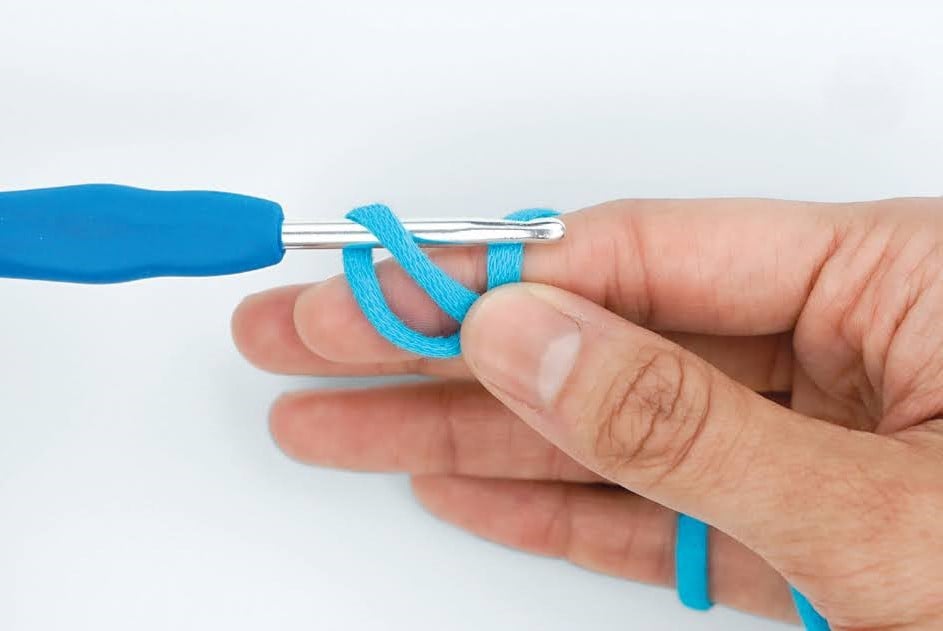 7. Rotate the hook so the tip is facing away from you, and grab onto the working yarn. 7. Rotate the hook so the tip is facing away from you, and grab onto the working yarn. | 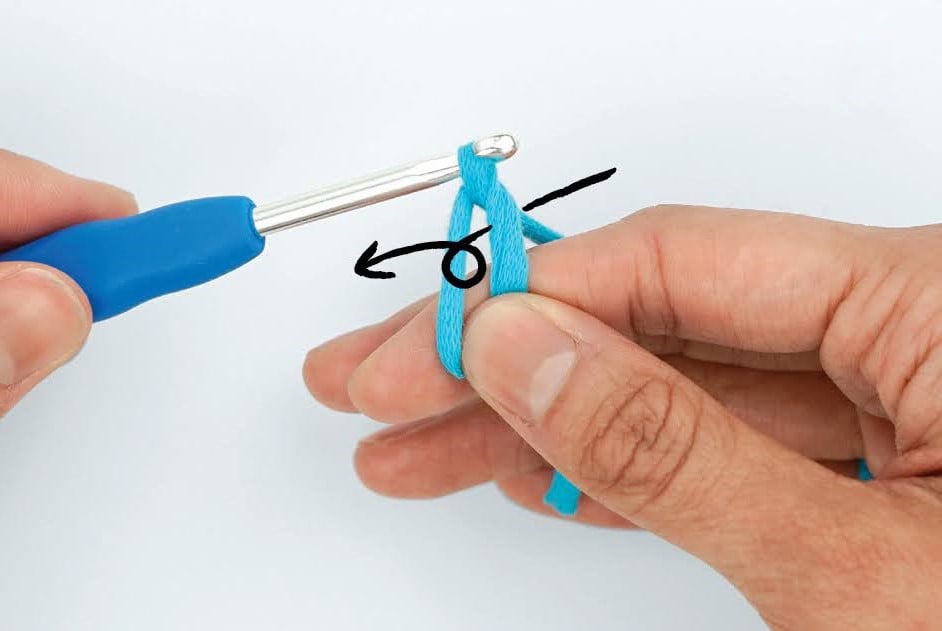 8. Pull the working yarn back through the loop, while rotating the hook so that the tip faces you again, to draw up a loop. If you need more tension in the working yarn, move your middle finger away from you. 8. Pull the working yarn back through the loop, while rotating the hook so that the tip faces you again, to draw up a loop. If you need more tension in the working yarn, move your middle finger away from you. |
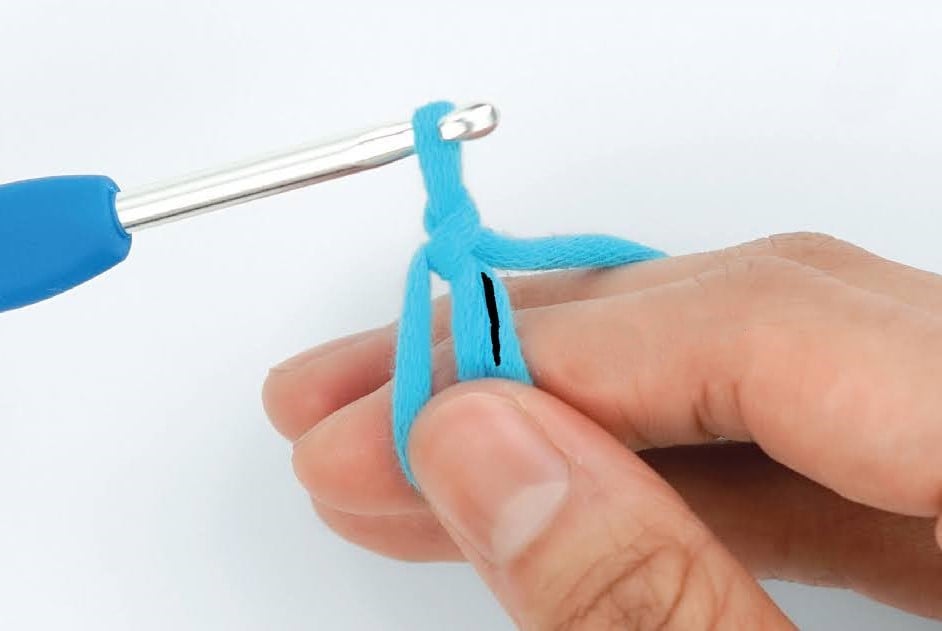
 9. The hook should be in front of the working yarn. 9. The hook should be in front of the working yarn. | 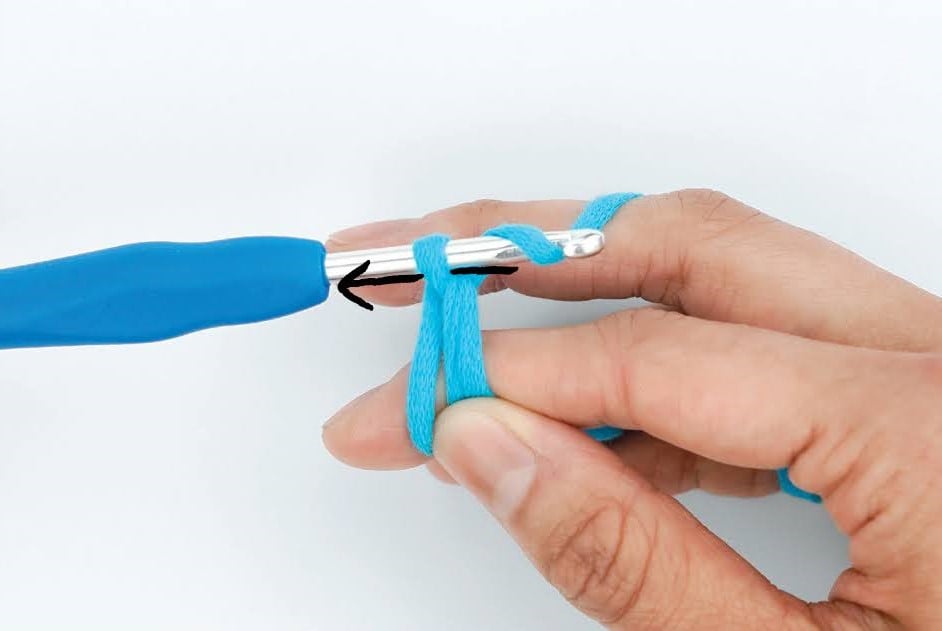 10. Yarn over. Pull the yarn through the loop on the hook. There should be one loop left on the hook. 10. Yarn over. Pull the yarn through the loop on the hook. There should be one loop left on the hook. |
TIP
You just made a chain stitch in step 10. This does not count as a sc in the magic loop.
If you can let go of the magic loop and everything stays intact, you’ve done it correctly. Huzzah!
Single crochet in a magic ring (step-by-step with photos)
 1. With your right hand, hold onto both the left and right sides of the magic loop and the yarn tail. Keep the yarn tail on the right side of the magic loop. 1. With your right hand, hold onto both the left and right sides of the magic loop and the yarn tail. Keep the yarn tail on the right side of the magic loop. |  2. Insert the hook through the middle of the loop, from the front to the back. The hook should look like it’s under the right side of the loop and the yarn tail. 2. Insert the hook through the middle of the loop, from the front to the back. The hook should look like it’s under the right side of the loop and the yarn tail. | 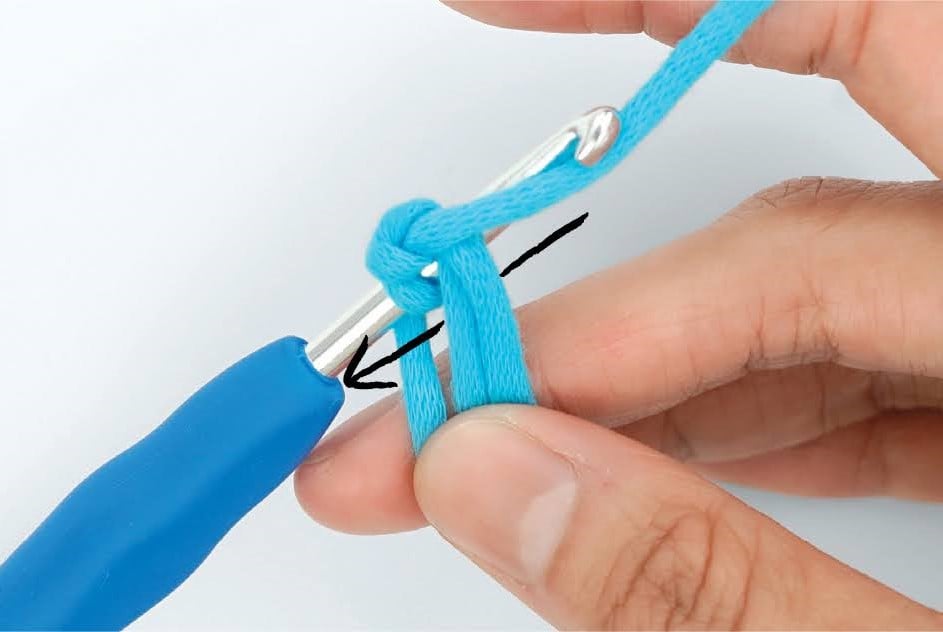 3. Yarn over. Pull the yarn back through the loop, under both the right side of the loop and the yarn tail, to draw up a loop. 3. Yarn over. Pull the yarn back through the loop, under both the right side of the loop and the yarn tail, to draw up a loop. | 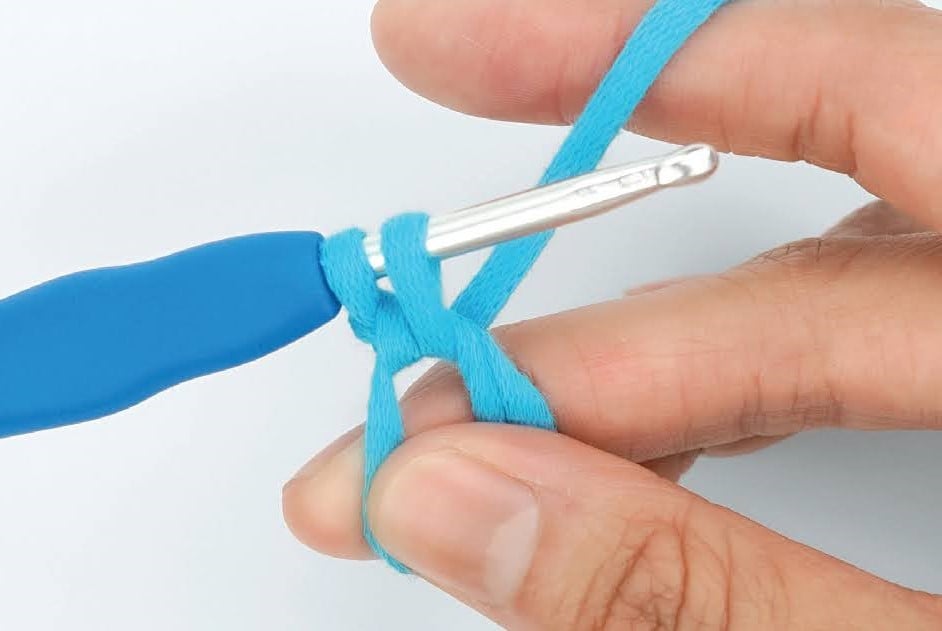 4. There should be two loops on the hook. 4. There should be two loops on the hook. |
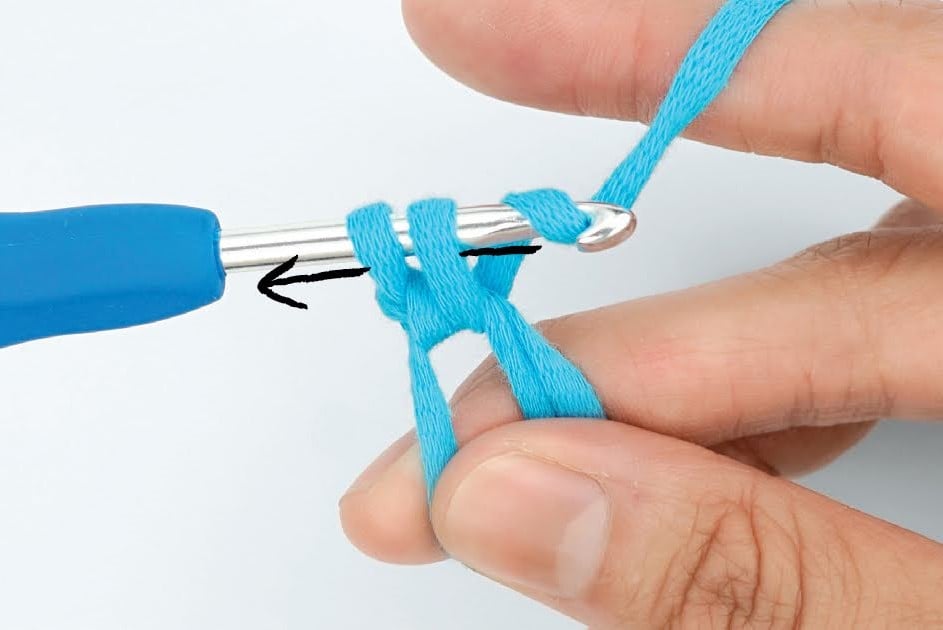 5. Yarn over. Pull through both loops on the hook. There should be one loop left on the hook. This completes one sc. 5. Yarn over. Pull through both loops on the hook. There should be one loop left on the hook. This completes one sc. | 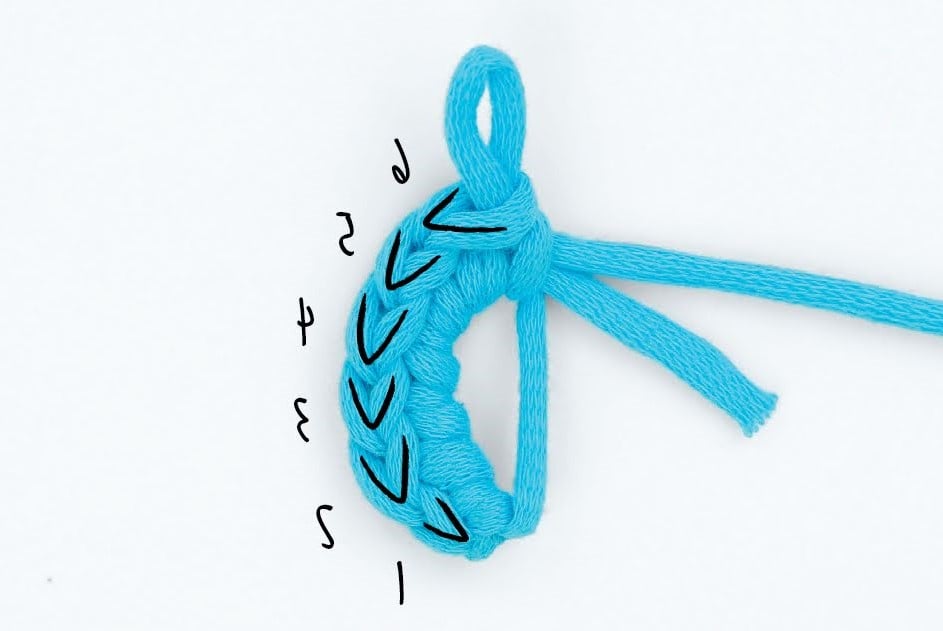 6. Repeat steps 2–5 until you have as many sc as the pattern calls for. 6. Repeat steps 2–5 until you have as many sc as the pattern calls for. | 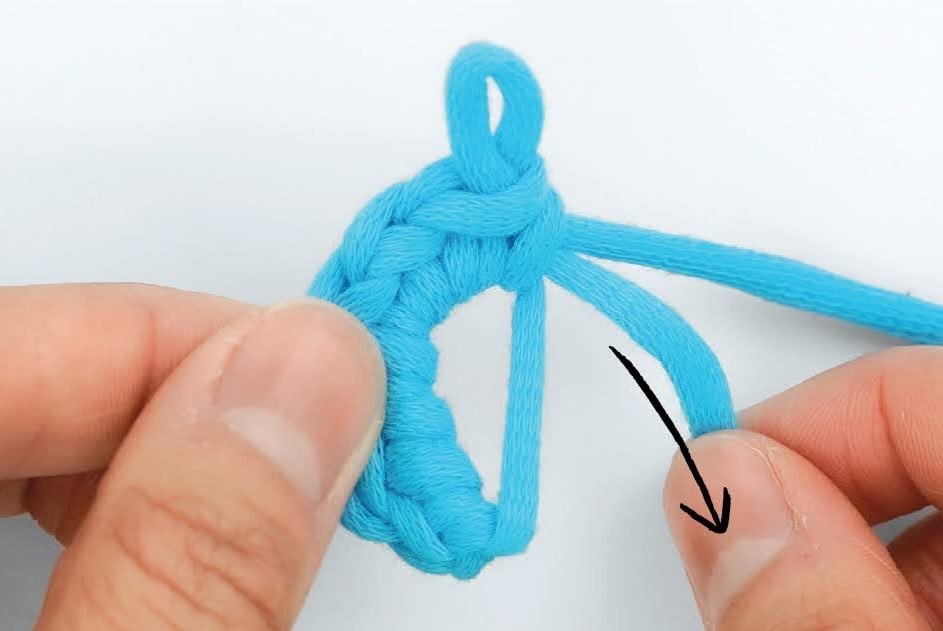 7. When you’re done, put the hook down. With your left hand, hold onto the top loops of the stitches you just made. With your right hand, pull on the yarn tail until the magic loop disappears. 7. When you’re done, put the hook down. With your left hand, hold onto the top loops of the stitches you just made. With your right hand, pull on the yarn tail until the magic loop disappears. | 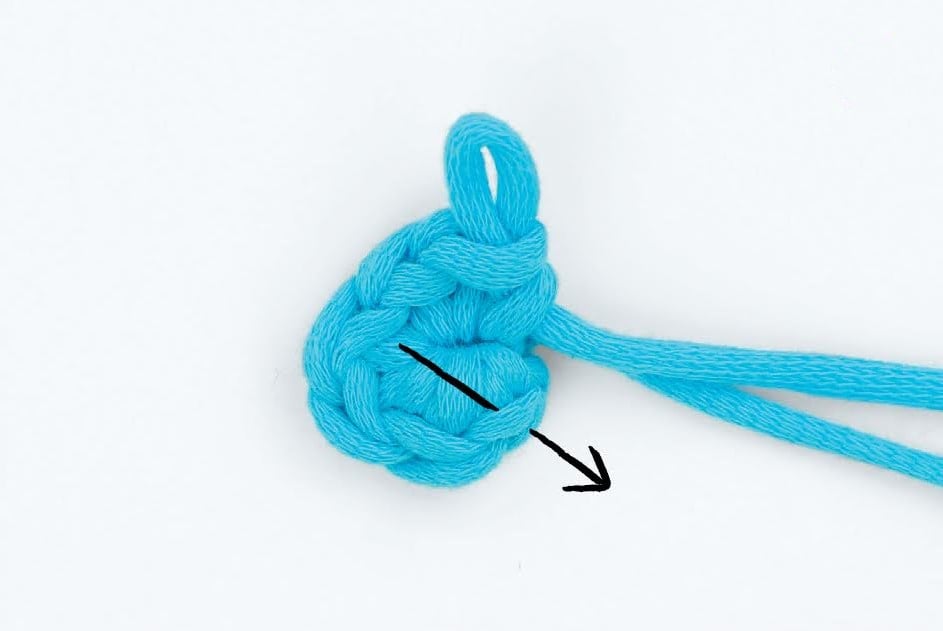 8. To start the next round, put the hook under the top loops of the stitch to the right. 8. To start the next round, put the hook under the top loops of the stitch to the right. |
TIP
Make it easier to find the first stitch of the magic loop later, by putting a stitch marker under the top loops of this first stitch the moment you make it.
 |