How to identify the right and wrong side of crochet
There’s a so-called right and wrong side of crochet. That sounds a bit harsh, so another way of thinking about it is that there’s a front and back side to your work. Here’s a picture of the same pattern, with the wrong side versus the right side facing out.
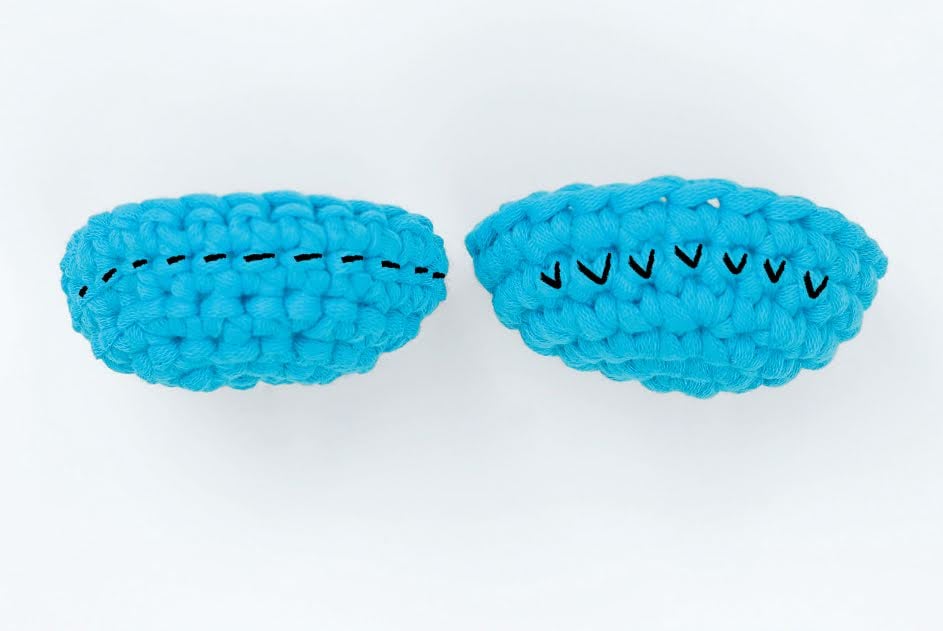
The wrong side has horizontal bars throughout the piece (left). The right side looks like a bunch of Vs (right).
Watch the video below for a demonstration on how to tell the right and wrong side of your crochet piece:
Telling the right side vs wrong side in crochet (step-by-step with photos)
When crocheting in a round, your piece will naturally curl at some point. The direction it naturally curls will make the wrong side face you. To make the right side face you, follow these steps:
 1. Make sure the wrong side is facing you. The wrong side has horizontal bars. 1. Make sure the wrong side is facing you. The wrong side has horizontal bars. | 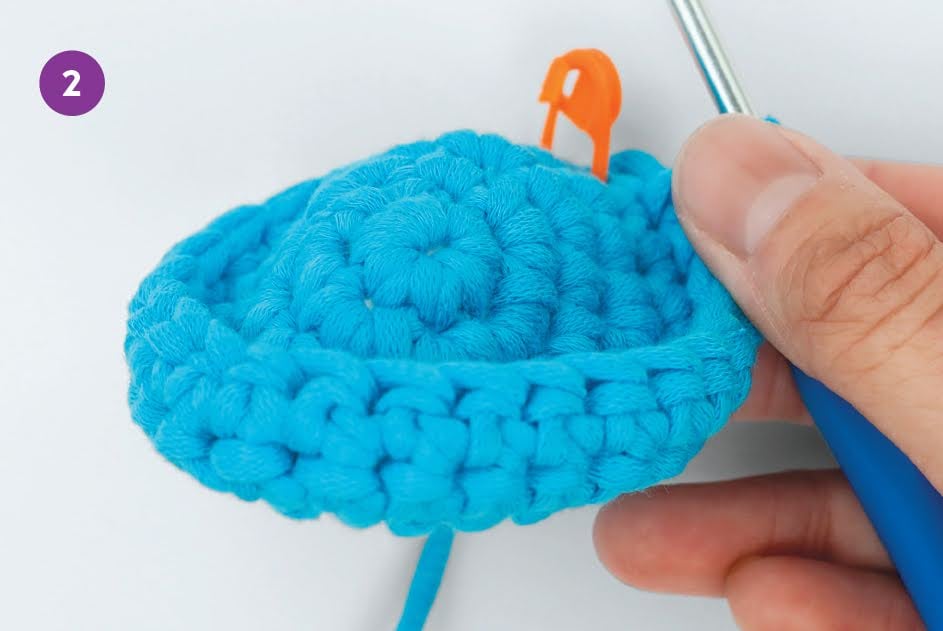 2. Push the middle of the piece until it flips inside out. 2. Push the middle of the piece until it flips inside out. |
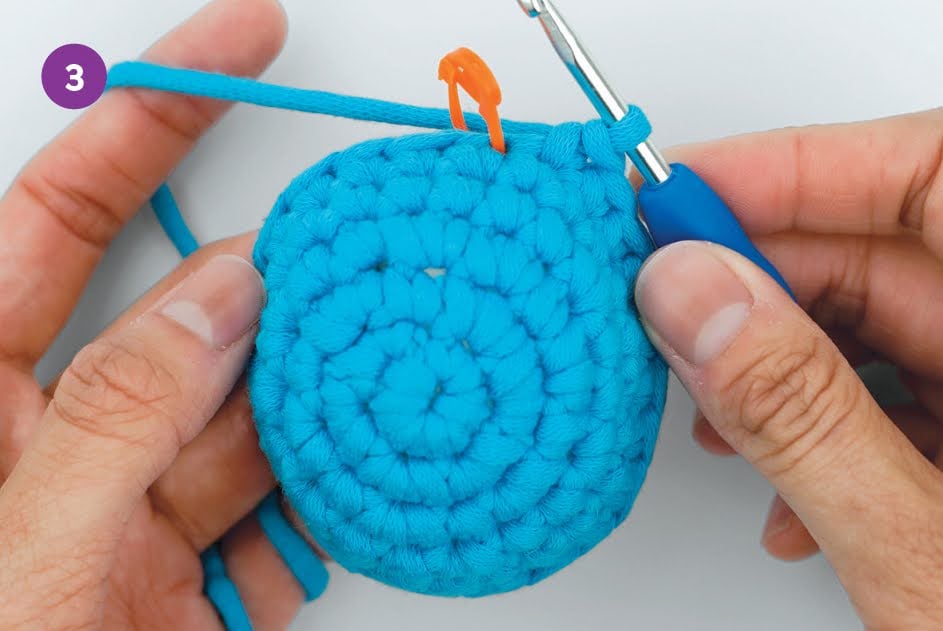 3. The right side will now be facing you, but your piece will be upside down. To make it easier to keep crocheting . . . 3. The right side will now be facing you, but your piece will be upside down. To make it easier to keep crocheting . . . | 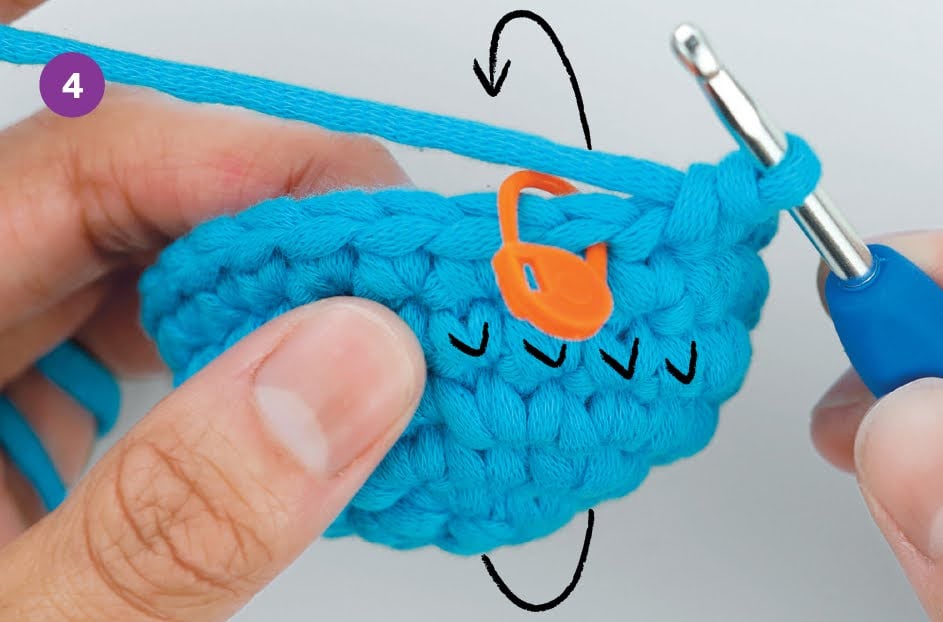 4. Rotate your piece until the open edge is on top of the piece, and the loop for the hook is on the side of the circle closest to you. The outside of your piece should now look like it’s made of vertical Vs. 4. Rotate your piece until the open edge is on top of the piece, and the loop for the hook is on the side of the circle closest to you. The outside of your piece should now look like it’s made of vertical Vs. |
TIP
Since it’s something that’s easy to forget to do, plus patterns don’t cue it, get in the habit of flipping your work as soon as possible to make the right side face out.